Corks as a superpower
The humble cork is a surprisingly versatile DIY stock material. Read about using them in your DIY projects.


Here's the scenario, you're standing in the superpower line to get yours. The excitement grows as you inch closer to the power dispensary. At last, you are there. The kindly being behind the desk looks you up and down and pronounces in a booming, authoritative voice, "Your superpower is corks!" Wait! What just happened? Corks as a superpower? What a load of dingos' kidneys. You demand a recount to no avail.
My little fable is a flight of fancy, for sure. However, the cork is a superpower in service to DIYing around the house. So, how do you wield your cork powers? Read on, and you'll see.
The basic cork kit
You'll need to assemble a few items to create cork magic. Here's the list:
- Corks, preferably real cork, not synthetic. Yeah, synthetic corks will work, but they lack the pizazz of the real thing. Start by assembling a selection of regular wine bottle corks. You can also collect champagne corks too. I'll write about their DIY uses in another article.
- A sharp knife, a small saw or a hacksaw blade.
- Glue, either household (white) or a super glue of your choice. I like and recommend the gel.
- Something for cork storage.
Note: While you can implement most cork DIY applications without glue, ensure the glue in your Simple Fixes toolkit is good, just in case. Super glues are notoriously short-lived once you open the container.
Sourcing corks
Right now, you may be thinking, "Hey, Mr. Simple Fixes, what is the best way to get corks?"
Well, that depends on how fast you want to build your collection. Here are three proven methods:
- My favorite method is buying and emptying wine bottles and saving the corks.
- Ask family and friends to save them for you. Cork etiquette rule 23,678; don't get picky over saved corks. That's bad form.
- Visit local wineries and ask for some used corks. Cork etiquette rule 10x239; Participate in a wine tasting and purchase a bottle or two of their wines before asking for corks.
All three approaches work beautifully, and collecting corks provides a perfect excuse to sip some of your favorite vintages, that is, if you like wine. "But honey, I'm just building up our DIY cork collection, honest!"
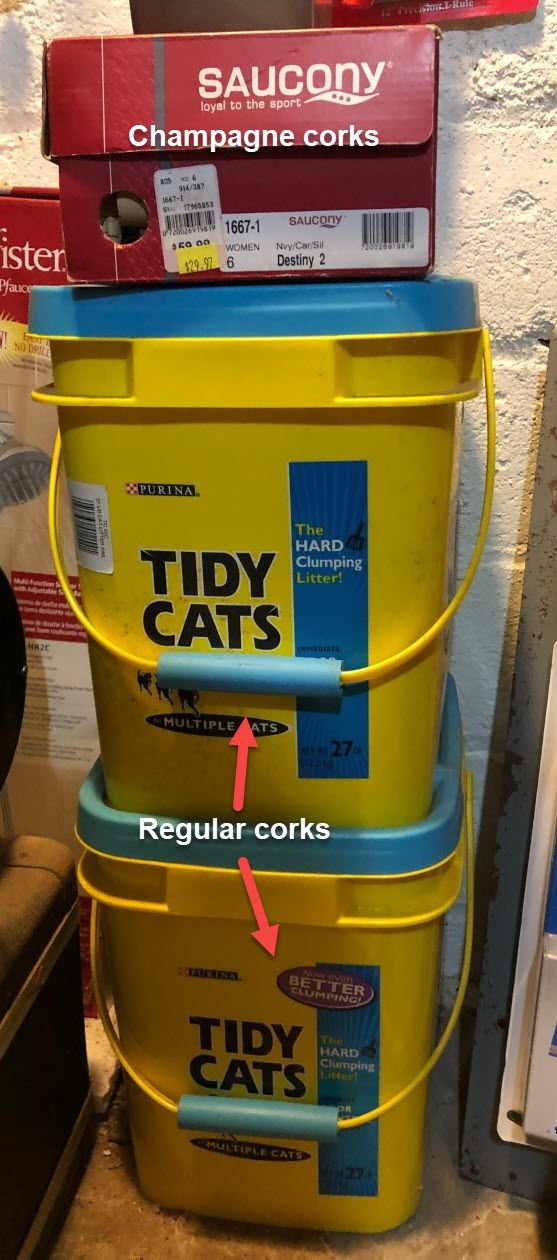
Storing corks
I store my corks in anything and everything, all of which are repurposed. These include several 27-pound kitty litter buckets, some five-gallon paint buckets, some H. K. Anderson Peanut Butter Filled Pretzel Nugget containers, shoeboxes and small trash bags.
A reasonable question here is, how many corks do I have? And an equally reasonable answer is that I haven't a clue—thousands for sure.
Put a cork on it
Now that your fledgling cork supply is growing let's talk about cool ways to put them to use. First up, put a cork on it. If you have something sharp and pointy that you scratch yourself on, chips your dishes or simply needs covering for overall safety, put a cork on it.
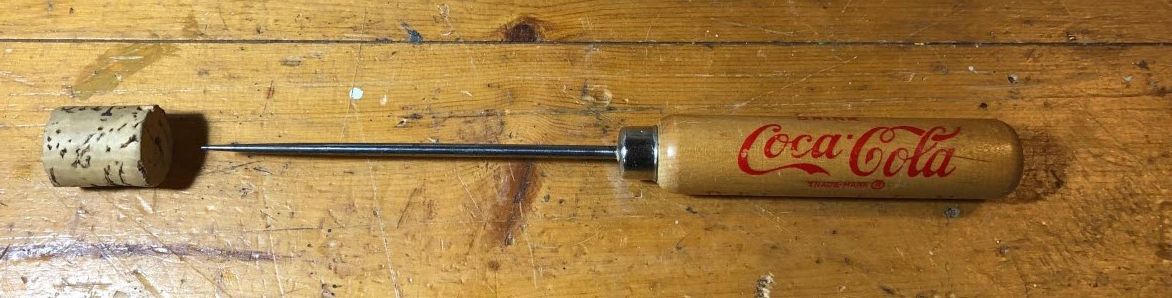
Use case #1 - the ice pick
So, I admit many folks don't have an ice pick, but it's a perfect example of keeping a sharp item safe until it's ice-picking time.
Here are the steps:
- Get a cork.
- Hold it firmly upright.
- Push the ice pick into the cork and yell, "Ta-da!"
Alternative sharp and pointy tip protector options
There are alternatives to the all-powerful cork if you deign to use them. They include Styrofoam balls, knitting needle tip protectors, and wrapping tape around it after use.
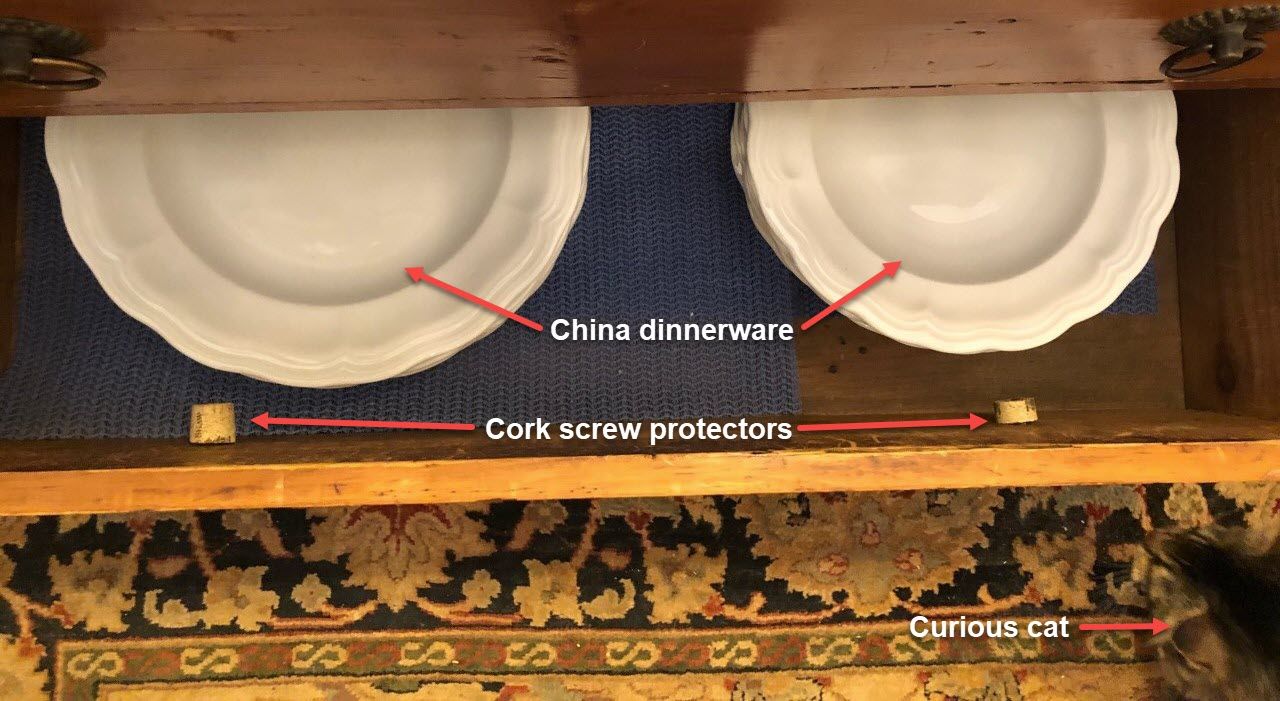
Use case #2 - drawer handle screws
You'll encounter this situation with antique furniture. We inherited a beautiful yellow pine three-drawer chest. The bolts for the handles stick into the drawer about 3/4 of an inch, creating a hazard to hands, arms and dishes. So, I put corks on each one.
Here are the steps:
- Determine how many corks you'll need based on the length of the screw. In my case, cutting a cork in half created the perfect length as determined by advanced mathematical algorithms: ((3 drawers x 2 handles each = 6 bolts to cover)/2) = 3 corks.
- Cut each cork to length using your utility knife, saw or hacksaw blade.
- Screw the cork into position and yell, "Booyah!! Note that I say "screw" the cork onto the bolt, not push. There are two reasons for this technique; it creates a better fit when the cork engages the threads, and corks are tough to push onto bolts.
Alternative sharp and scratchy bolt protector options
Options include cutting the exposed portion of the bolt nearly flush with the nut, pushing small Styrofoam balls or pieces onto the bolt, covering them with cotton balls and wrapping tape around them.
There are problems with three of the options. Cutting the bolt often mucks up the threads, making it difficult to remove the nut in the future. Rethreading the bolt solves this problem but makes the task more difficult. It's your choice. The Styrofoam and cotton options tend to fall off. Tape is okay if that's the look you're going for.
Put a cork behind it
Using corks to stabilize furniture and protect walls from damage is an amazingly effective solution. It is also my first use of corks in a DIY situation. Let me provide two examples.
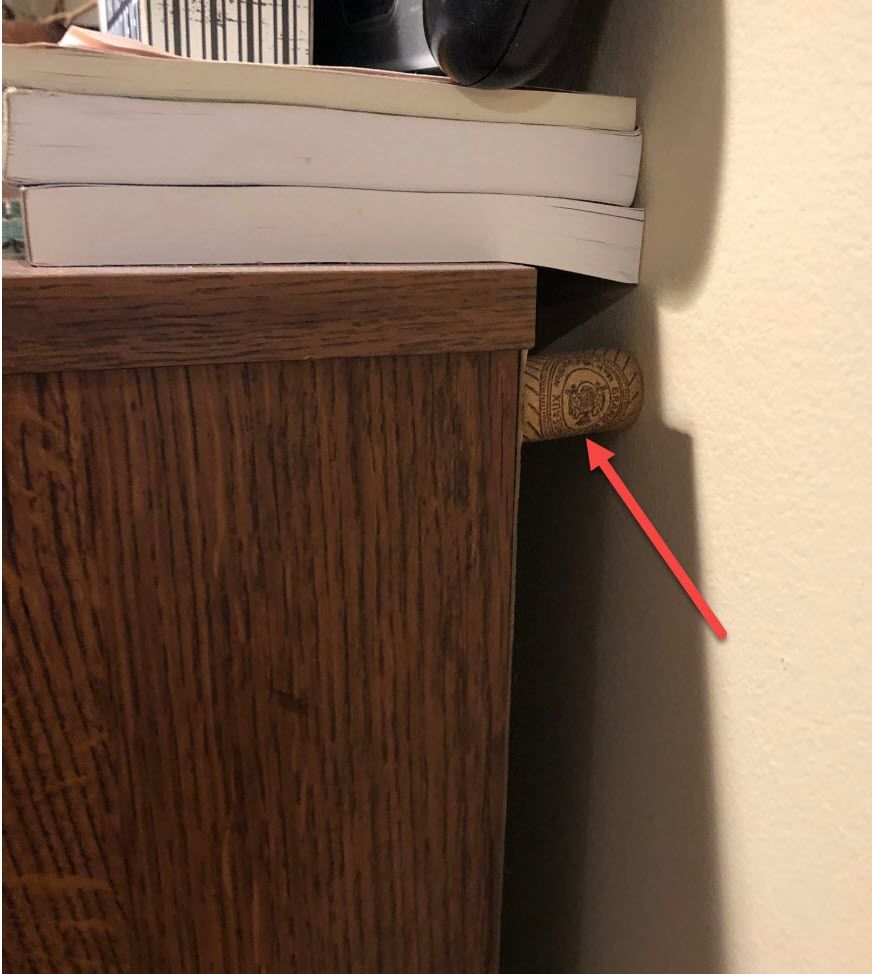
Use case #3 - holding stationary furniture away from the wall
Right, now, here's the scenario; you have a piece of furniture like a credenza, armoire or book shell along a wall. It is tipping back and marking up the wall. How do you fix this problem? With a cork and physics.
Here are the steps:
Move the piece of furniture away from the wall to a proper vertical alignment.
- Measure the gap and cut corks to fit.
- Pull one side slightly forward and place the cork between it and the wall, holding the cork until the weight of the furniture holds it in place (this here's the physics I promised ya'll).
- Repeat on the other side. Note: It is best to have a helper to ensure the first cork stays put while you pull the furniture forward for the second cork.
- Stand back, admire your DIY genius and say in your best French accent, "Oo-la-la!" Oh, come on, everyone has a French accent!
Note: Try not to glue the cork in place; however, if you must, glue it to the furniture back as long as it is unfinished. Gluing it to the wall will leave a mark.
Put a cork under it
Use case #4 - appliance foot replacement
At some point along the way, our stove lost one of its leveling feet at the left front position. Thankfully, it wasn't a rear foot, as that's a royal pain to access. Anyway, the options included buying a replacement foot or doing it myself. Really, there was only the DIY option in my mind.
Here are the steps:
- Get the following together; a champagne cork, a knife, wooden shims and something to raise the stove while you work. You know, an appliance jack like a phone book.
- Lift up on the stove using your legs, not your back, and slip the "jack" into position. Make sure you have room for your surgery.
- Trim the bottom end of the champagne cork so it fits snugly in the hole left after your OEM foot took off on its own. You want the top of the cork as the surface touching the floor.
- Push the cork firmly into the hole, trimming as needed.
- Remove your appliance jack and check your level. Is it spot on? Well, alrighty then! If not, there's more to be done.
- Lift the stove slightly and push a shim one-quarter of the way under the cork. Set 'er back down and check your level. Repeat as necessary.
- When you hit level, reward yourself with a boisterous outburst of your famous quote. "Who's your daddy stove" is a DIYer favorite.
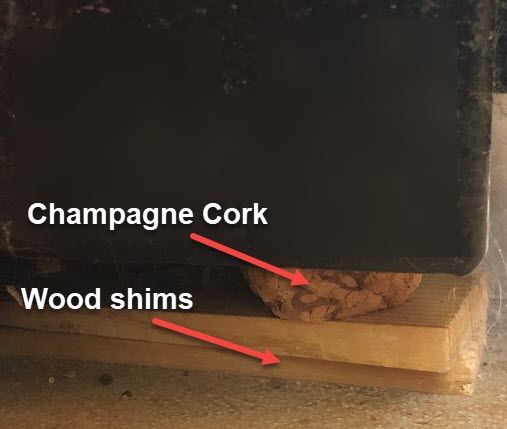
Notes: You may need to use more than one shim, as I did. If any part of a shim extends beyond the appliance front, cut it off. Mark a line directly under the stove's body and remove the shim. Cut off the excess and reinstall.
More cork tips to follow
I realize this article is getting a bit lengthy, so I'll stop here and publish part dos at a future date. In the meantime, round up some corks and see what you can fix around the homestead.