IKEA, let me introduce you to my little friend Sugru
Make IKEA furniture do what you want with a little Sugru.

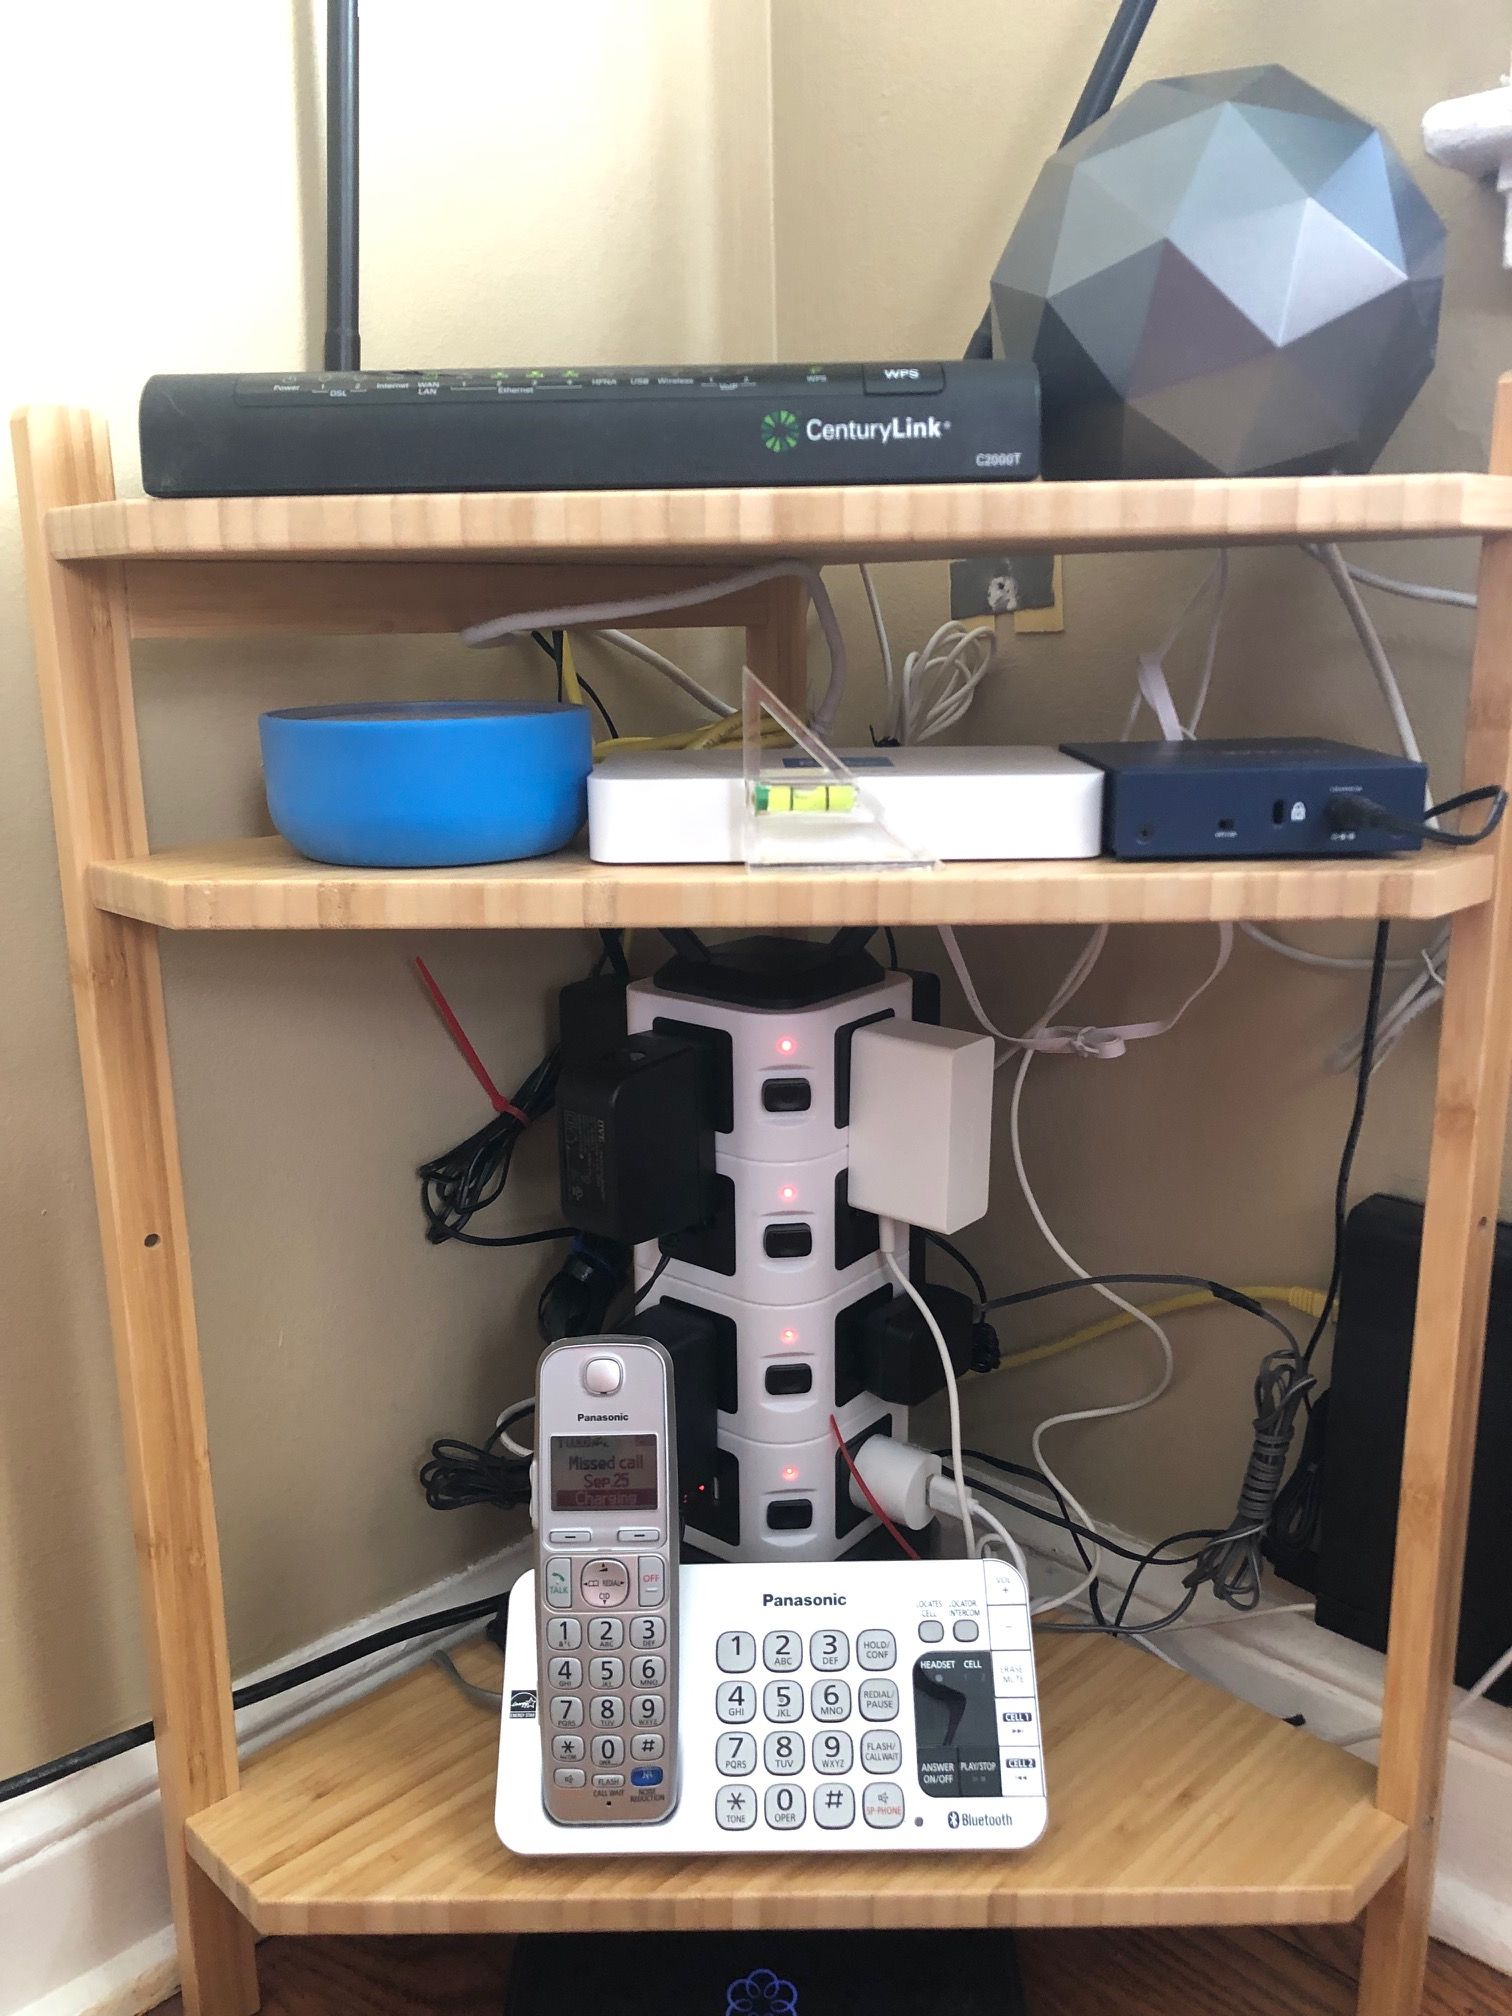
Recently, I was asked to "do something" with my home networking gear so my wife could rearrange her workroom. Why is my networking gear in her workroom? Because that is where CenturyLink enters our house. She often accuses me of having too much electronics stuff, and in this case, I have to admit, it may be the tiniest bit too much.
Here's the lineup:
- CenturyLink fiber interface
- CenturyLink modem and router
- Norton Core router and firewall
- FingBox
- Cordless phone base station
- Ooma VOIP box
- WeatherFlow Tempest wireless dongle
- SamKnows RealSpeed internet speed recording device
- Netgear 5-Port CAT5 switch
You get the drift. She wanted a corner shelf that would fit under her table and had identified a couple of options, one of which was a nice bamboo kit from IKEA. In case you've been completely isolated in a remote wilderness area, you've undoubtedly heard of the Swedish giant IKEA. They have a reputation for excellent and affordable products. They also have a reputation for their kits being a challenge. This must be true, judging solely by the number of comedians who work it into their acts.
A trip to our nearby IKEA proved they were out of damn near everything in a corner shelf. Seeing as how the project had a bit of urgency, I ordered it from the IKEA website. It was a pleasant experience, and I received my shelf in short order. Faster than I expected, at any rate.
Tips to enhance any IKEA assembly experience
I snapped a picture of the instructions that came with my shelf. Saying they are basic is like saying it the Sun is really hot. But hey, I get it. To accommodate all the languages would be a pain.

Tip 1: Check to be sure everything that is shown in the instructions arrived.
Tip 2: Familiarize yourself with the instructions. For major IKEA products, having their help number is a good idea. No, it isn't 1-800-OH#-$%*@, although that might work.
Tip 3: Set the tiny silver hex wrench aside and get a real one from your toolkit. I'll wait.
Tip 4: Assemble the kit but do not tighten the screws all the way yet. You want to save that step for last so you can shift the item around and get the best alignment/square/levelness/etc.
Note: If a screw will be inaccessible after all the parts are put together, tighten those screws completely.
Tip 5: Tighten everything nice and snug. I often use the IKEA-supplied hex wrench, so it doesn't feel left out. Tools have feelings too...I think.
What about the Sugru? When are you talking about that?
Hold your horses; I haven't forgotten. It turns out that my 16-outlet vertical plug strip was too tall to fit on the shelf using the factory-drilled holes. That left me with two options:
Option 1: Drill new holes myself.
Option 2: Use Sugru to create little brackets to hold the shelf securely in its new position.
Since the items that were going on the shelf were light, and I planned to rest the shelf on the plug strip handle, Sugru was the best option.
I won't repeat the steps in using Sugru, as you can find those here. Instead, I'll list the steps to follow for the entire fix.
Tools needed: Sugru, scissors or knife to open the Sugru package
Tools recommended: Small bubble level, disposal gloves if you don't want Sugru on your hands
1. Place your shelf in position and level it with your bubble level.
Note: If the shelf will not stay in place, put a little masking tape under it until you start applying the Sugru.
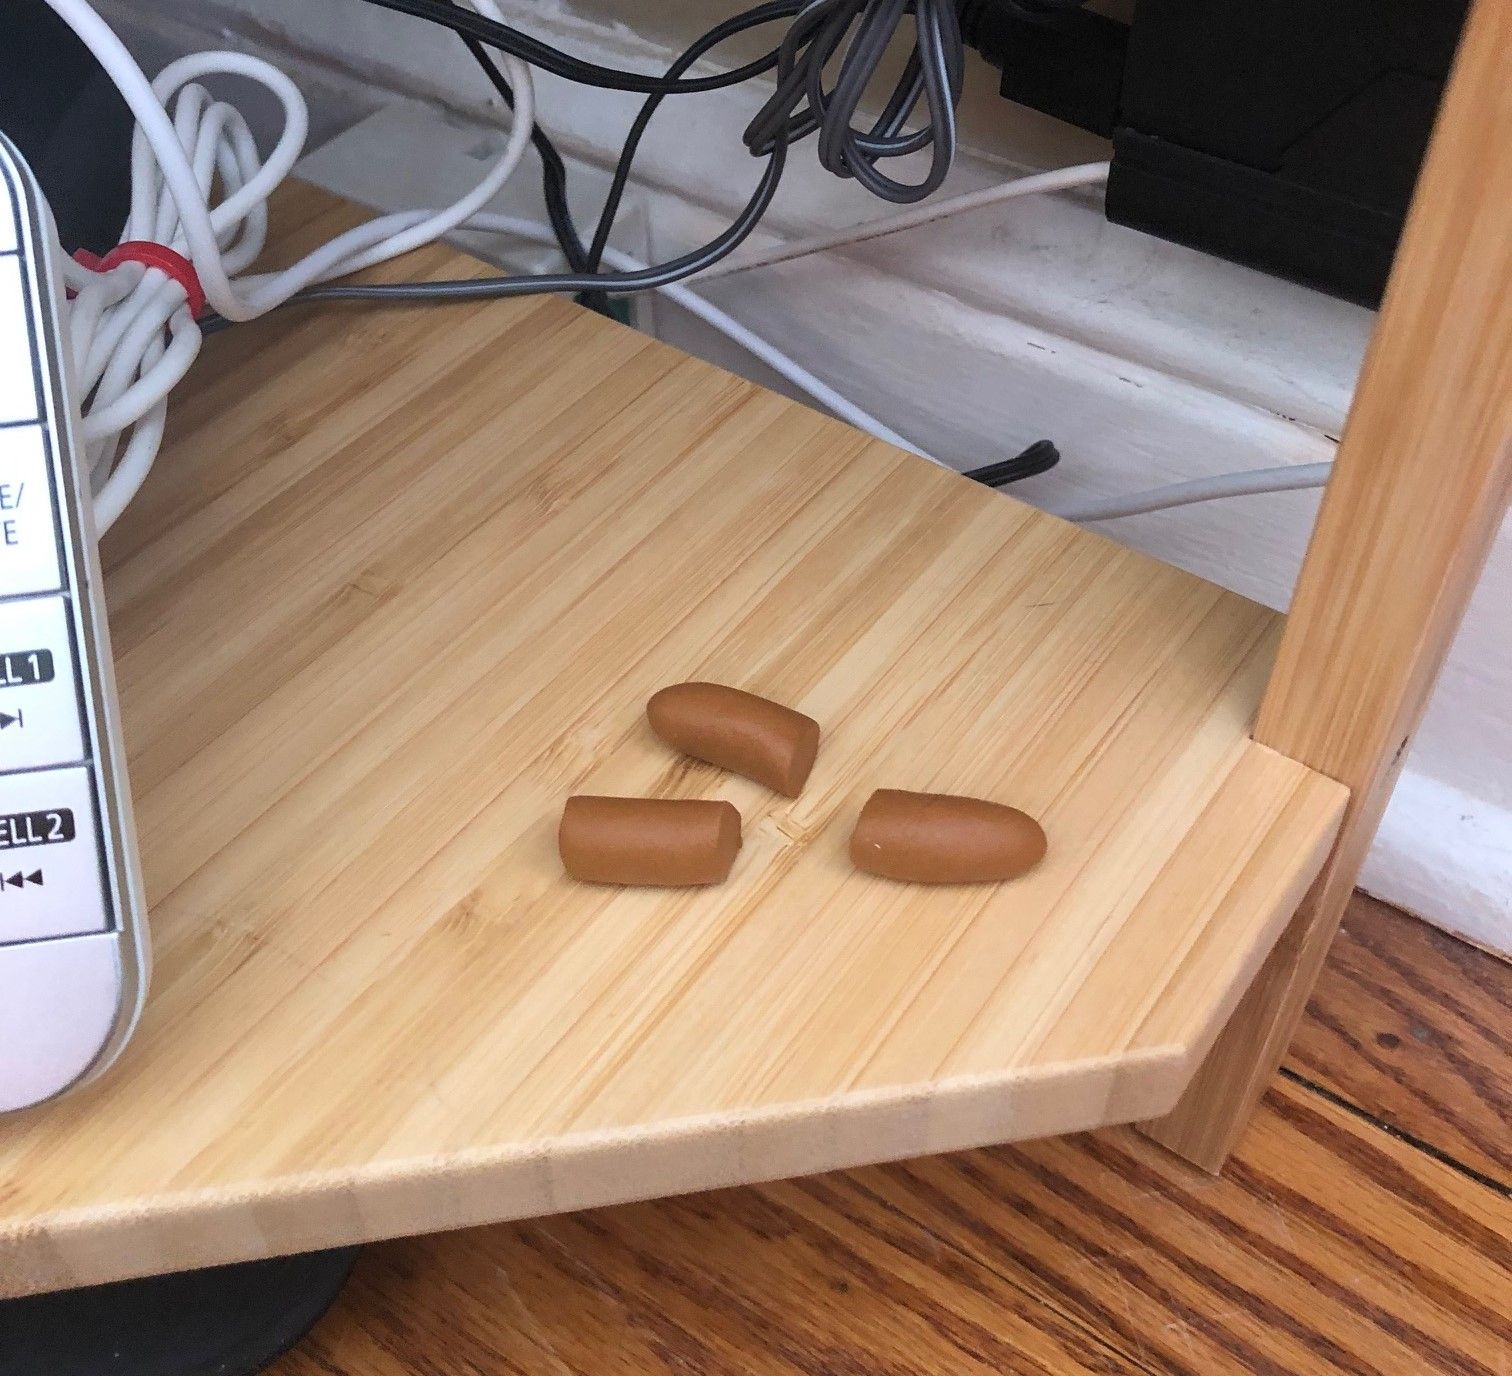
2. Choose your Sugru color - I went for brown since it was a wooden shelf unit.
3. Knead it to get it nice and pliable, then roll it into a cylinder and cut it into three equal pieces as shown. Not, the cat didn't visit my project; that is my Sugru.
4. Remove the masking tape if you used it and apply the first piece of Sugru, forming a nice triangular shape. Repeat until all corners have their Sugru.

5. While the Sugru is still setting up, check your level and gently adjust as needed.
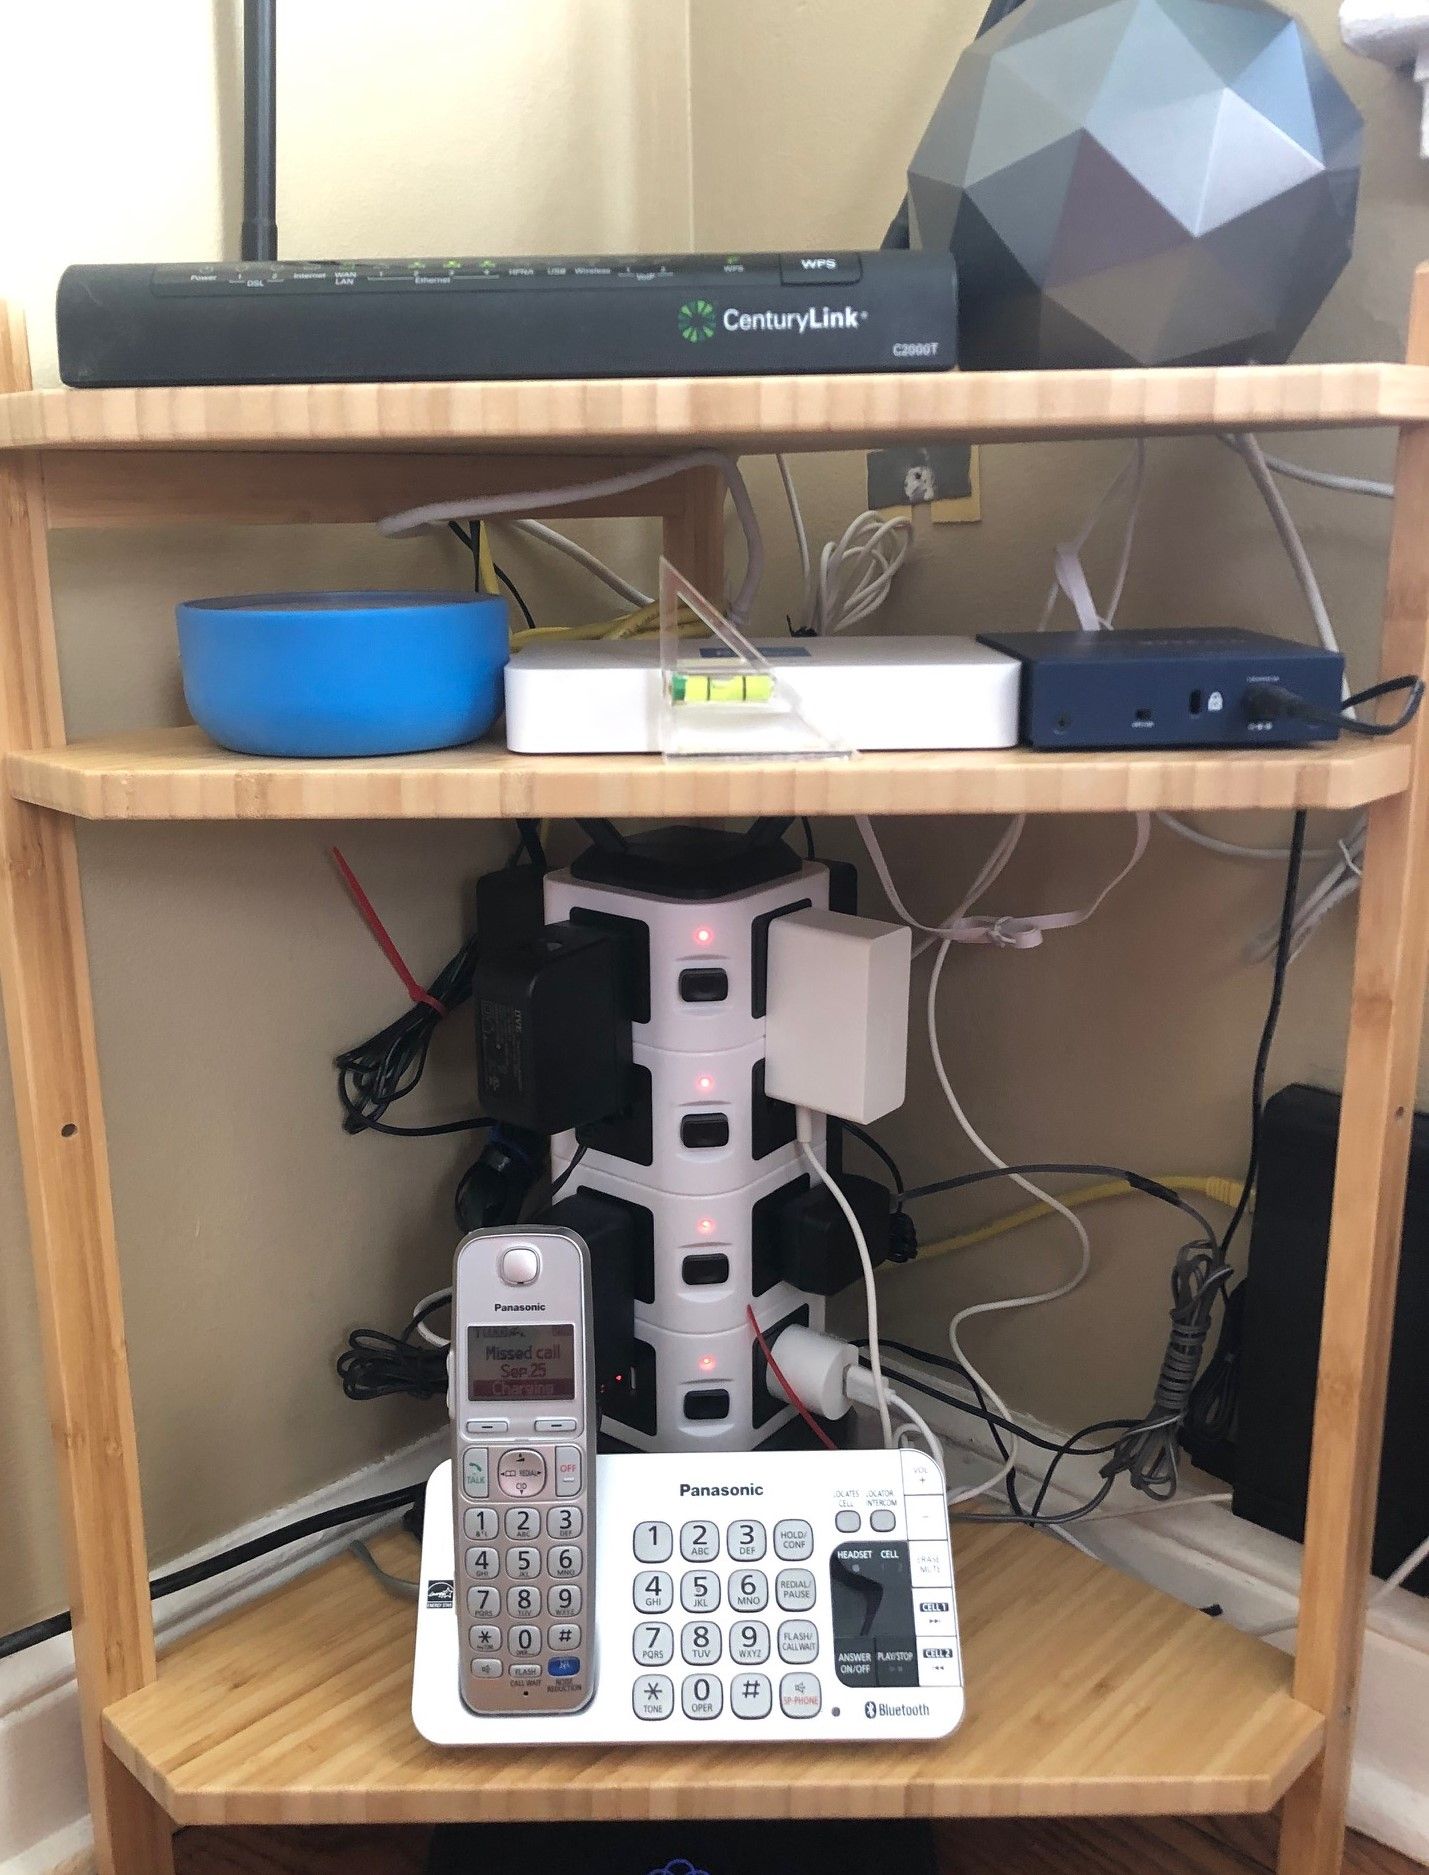
Here's the final project. Sugru and IKEA took a liking to each other right away! You'll notice a bubble level on the center shelf. It's hard to see, so you'll have to believe me when I say it's nice and level.
Footnote: The beauty of using Sugru versus redrilling holes is that I can remove the Sugru in the future and won't have extraneous holes.