Quick Fix for Sticking Toilet Float
Toilet float valve sticking? Read this simple fix to solve the problem.

Faulty Float Fix
Ah, I love the sound of alliteration in the morning -- or is it the smell of napalm? No, I'm definitely sticking with the first choice, no disrespect to the famous Apocalypse Now movie quote.
This may be my shortest simple fixes post yet unless I provide some backstory. Yes, that's exactly what I'll do. So, here goes. Toilet mechanisms are a royal pain when they misbehave. Leaky flappers and balky fill valves routinely crop up at the worst times. Wait, plumbing problems make their own worst times. Anyway, the upshot is that the toilet won't stop running, or it won't fill, necessitating the removal of the tank lid and jiggling and wiggling parts when the time-honored handle jiggle fails to fix the issue.
Toilet Repair - Ugh!
Toilet repairs rank at the top of DIY stuff I detest. They are messy, difficult, and always wet. Regardless of how careful I am, water invariably goes everywhere. Then, there are the corroded bolts and rusty interiors. If plumbers weren't so doggone expensive, I'd call one.
Meet Your Float
Toilet mechanisms are relatively simple in terms of operation. You push the handle to raise the flap. This allows the water in the tank to flush the bowl. Then, as the water empties, the float drops, activating the fill valve. As the water fills the tank, the float moves up until it hits the limit and shuts off the fill valve.
There are two primary float designs: the ball and rod and the vertical float (my current style). You may have seen one or both if you've ever removed your toilet tank top. Adjusting the ball and rod involves bending the rod to place the ball in different positions, which controls how much water refills the tank. You adjust the vertical float with an adjustment rod. Moving a nut up or down allows you to set the refill level.

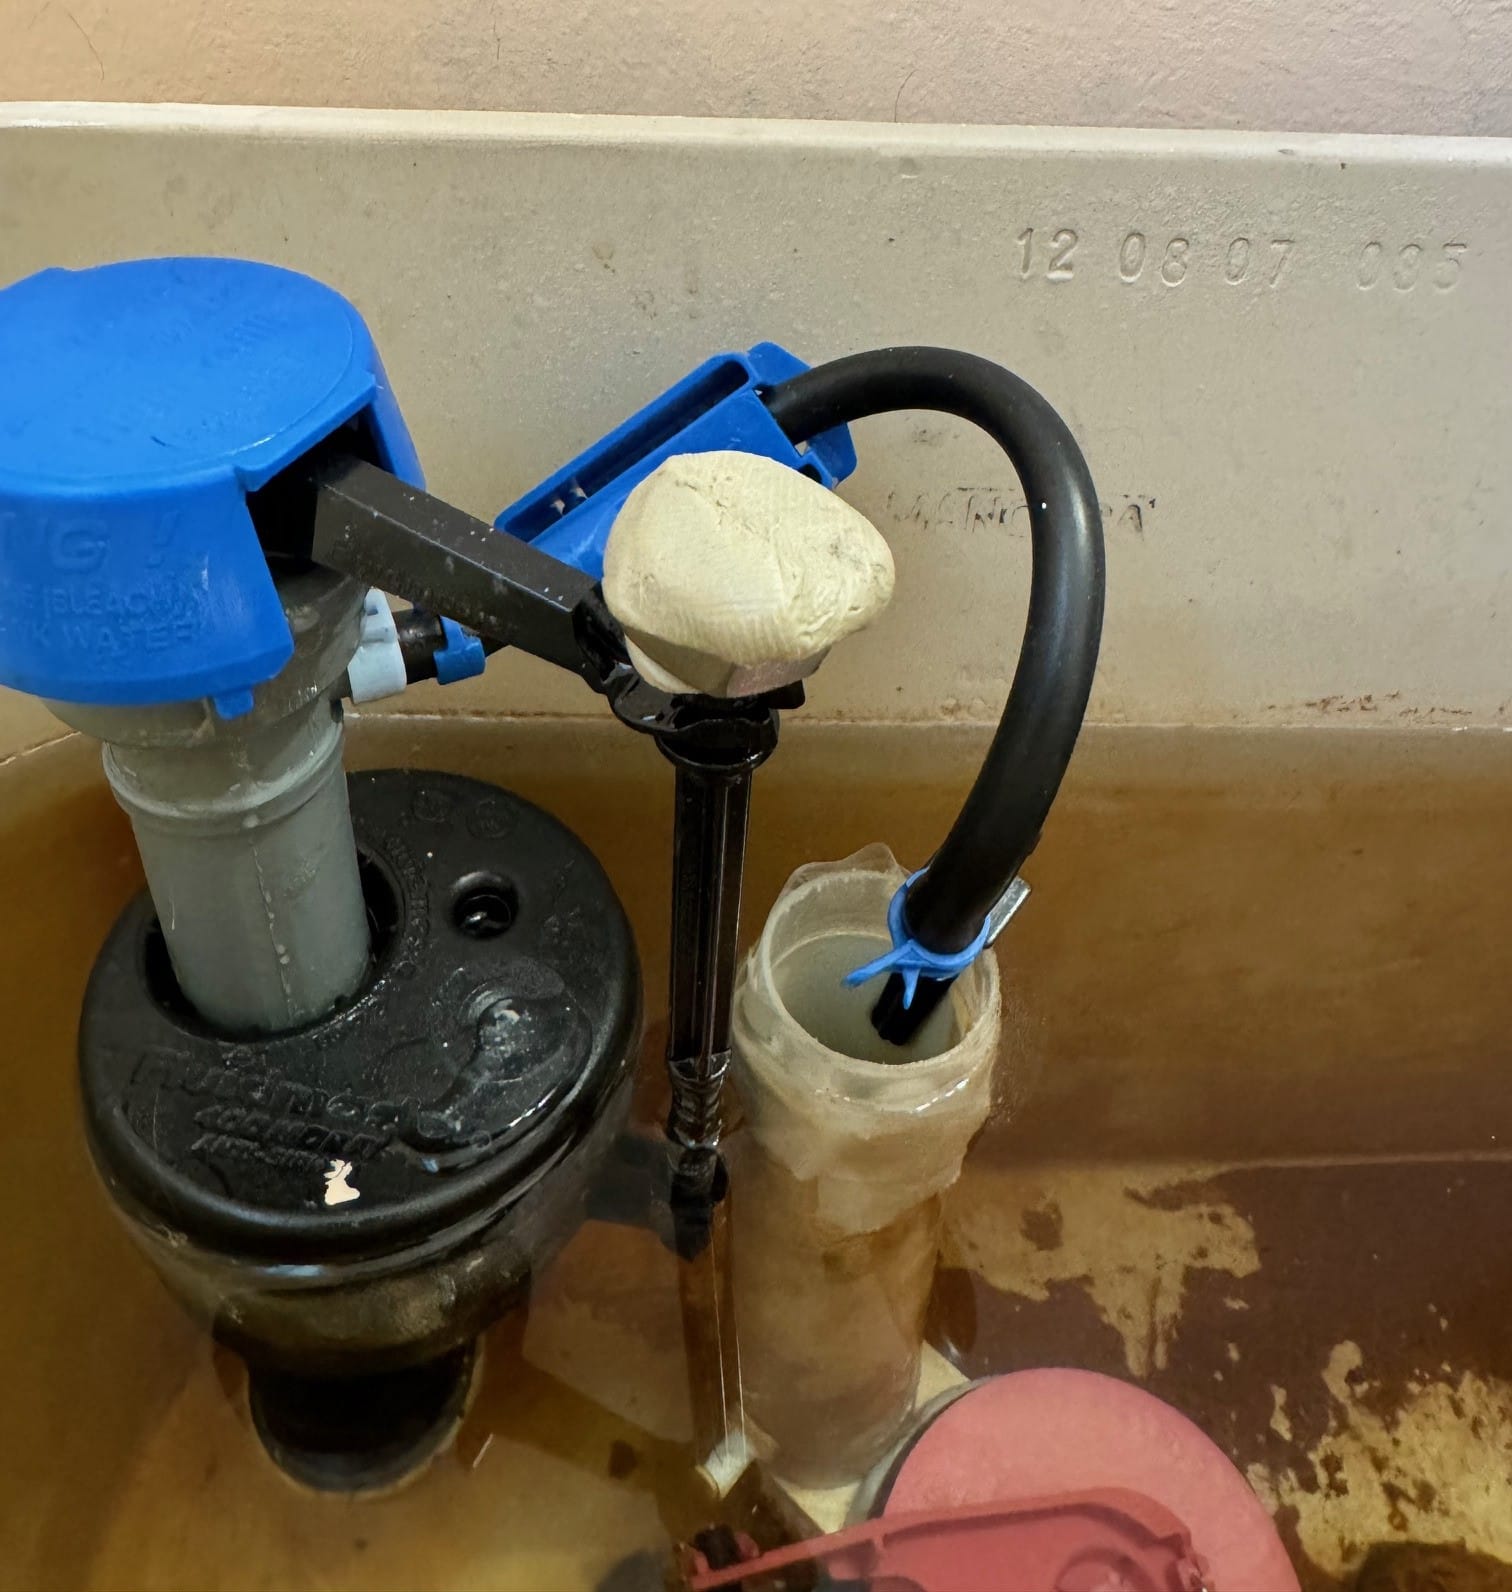
Key:
- Water flap.
- Vertical float.
- Float hinge area - WD40 target.
- Adjustment rod.
- Plumber's Putty and stainless-steel nut installed.
A. Typical toilet tank rust.
Troubleshooting
The two most common problems in my experience are that the toilet continues to run or it won't refill. Faulty flaps are the culprits most of the time when the toilet keeps running. You can often fix the problem by wiping away the rusty sediment under the flap and around the seal or replacing the flap completely. Float adjustment can also solve the problem.
When the tank won't refill, it's generally because something is sticking somewhere. You know the rule, "If it should move and doesn't, use WD40." And that's precisely what I did -- after removing the tank lid, I liberally doused the hinge area. It worked! Once. So, I tried a couple more times without success.
The vertical float resembles a donut and rides up and down a plastic pipe. My next move was to try WD40 on the pipe to make the float move easier. Nope, didn't help. Then, I tried silicone lubricant without success.
The Eureka Moment
I resigned myself to removing the lid and pushing down on the adjustment rod procedure. The last time I did this, the little lightbulb went off. I used just a bit of force to make the rod move, so what if I were to add a weight to the top of the rod to simulate that pressure?
My brain kicked into solution mode, and I started cogitating about ways to measure how much force I was using and converting that into the amount of weight required. Naw, that's too complicated. I'll wing it with a nut and some sticky stuff.
What You'll Need
To pull off this DIY magic, you'll need the following:
- Plumber's Putty
- 1/2" wide stainless-steel nut (use stainless for corrosion resistance)
Step-by-Step
- Make a smallish ball of Plumber's Putty, enough to fill the center of the nut and extend beyond it.
- Push the putty into the nut so some comes out of the bottom. I also made sure I had some sticking out the top, too.
- Press the nut firmly onto the top of the adjusting rod.
- Done! Test for proper operation and use a larger nut if necessary.
The Why's and Wherefores'
As noted, I used stainless-steel for corrosion resistance, although that isn't absolutely necessary. If you have a carbon steel nut, use it.
I used Plumber's Putty rather than an adhesive since I didn't know how many tries I'd need to get it right. The Plumber's Putty stays flexible, allowing me to remove and reuse it. Plus, it holds the nut in place and still allows for future adjustment if needed.
Don't Fear Trying the Fix Yourself
As much as I dislike toilet repair, I thoroughly enjoyed analyzing the problem, trying different fixes, the eureka moment, and the satisfaction when my simple fix worked. It might stop working at any time, but for now, I am content. Don't deprive yourself of one of life's small victories.