Using a thought experiment to solve a DIY problem
Using a thought experiment to solve a DIY problem is a great approach that leads to creative results and a good mental workout.

What is a thought experiment?
Okay, everyone, bear with me here. What I describe in this post only vaguely resembles the scientific definitions of thought experiments. However, there are similarities.
Define a thought experiment
According to Wikipedia, a thought experiment is:
...a device with which one performs an intentional, structured process of intellectual deliberation in order to speculate, within a specifiable problem domain, about potential consequents (or antecedents) for a designated antecedent (or consequent).
Crystal clear, right? Well, not to me. Let me put it into my jargon for you. According to Tom, a thought experiment is:
...a mental process you use to develop a solution to a DIY project using your knowledge of how things work and what objects you have on hand or can get.
Now that's better! Apologies to philosophers, psychologists and others if I've given an essential element of your world short shrift. Purely unintentional.
How does a thought experiment help with a DIY task or project?
The inspiration for this article is two-fold. In an earlier post about Project Books, I took a rough stab at thinking through and designing a solution for a project. If nothing else, it was a start. The second inspiration came late last week while researching how to repair a Pelikan Level 5 fountain pen. A short-lived futuristic pen, the Pelikan has a unique filling system that was not working. Unlike my other fountain pens, the Level 5 did not offer any easy, visible means of taking it apart, meaning research was in order.
Exploded parts diagram or maintenance instructions
Regular readers will recall my advice to seek out exploded parts diagrams for the devices and products they own and want to repair or maintain. What, you don't remember? Well, that means there will be quizzes in the future. Unannounced, of course, to ramp up the tension... Nah, then I'd have to grade them, fill out a report card, blah, blah, blah.
Anyway, the user manual for my pen is what I affectionately refer to as POS. To some, this stands for Point of Sale, but in this case, it stands for Piece of Sh#@. In other words, it was worthless. So, I started an internet search for maintenance instructions and diagrams.
While I did not find any diagrams, I did find an excellent post on a German site, www.penexchange.de. The post was complete enough to guide me through disassembly and cleaning the pen.
Am I ever going to get to the point?
An excellent question to which the answer is, "Yes, right now." Step 2 instructs you to depress the two round dots on the top of the pen, being careful not to damage the material. After some inspection, I spied the two circles in question and began to run my thought experiment.
The Level 5 thought experiment
Well, all-righty, then (channeling Jim Carey), here are the elements for my thought experiment to fix my Pelikan Level 5.
Task:
Remove the innards of the fountain pen pressing in on the two round dots without damaging the material.
Data:
- The two dots are actually springy buttons that hold the end of the ink filing and delivery mechanism in place.
- They must be pressed in simultaneously while pulling out the mechanism.
- There is a small o-ring that must be retained and reused.
- Any ink in the pen will immediately spill out uncontrollably.
Solution development:
Working thesis: Rig up a method of depressing the buttons simultaneously with one hand, leaving the other to pull out the guts. A question, please: is the correct technical term innards or guts? You've used both. Neither, but they are more fun than "mechanism."
- Use tape to hold the pressure items in place - hold this thought and embellish.
- Would a toothpick work - no, too clumsy, even if cut down.
- Wooden matchstick - ditto. This approach is dead.
What in my experience is similar? There are myriad applications where a ball bearing in a detent serves to operate and mechanism like this. What I need are tiny ball bearings, 1/16th" in diameter.
- Do I have any? Why yes, I do in one of my shop containers. Woot! Uh-oh, the container is buried out of reach until Spring.
What else might work? Well, the pen body is thin, and the buttons do not need to travel very far. So, another small ball somewhat larger than the dot could work.
- Do I have any of those? Not individual balls, but I do have a metal pull chain, hereinafter called "balls." The balls making up the chain are the proper size, and since they are connected, I do not need to worry about them dropping into a black hole somewhere like my other tiny parts often do.
Time to put the design to the test. But first, a stray thought; do you think Level 5 might be a good sci-fi novel title?
Time to test!
Here we go! Time to see if the mental design works!
Tools and materials needed:
· Duct tape - I opted for my bacon patterned roll.
· Metal light pull chain.
· Paper towels.
· Kitchen or laundry room sink.
Step-by-step
- Tear narrow strips of duct tape to secure the pull chain in the dots.
- Place the chain in one dot and tape it securely in place, applying pressure to push the ball inward. Note: Be sure to keep the tape off the silver end cap.
- Repeat the process for the other dot. Note: At this point, it became clear taping both dots will not work.
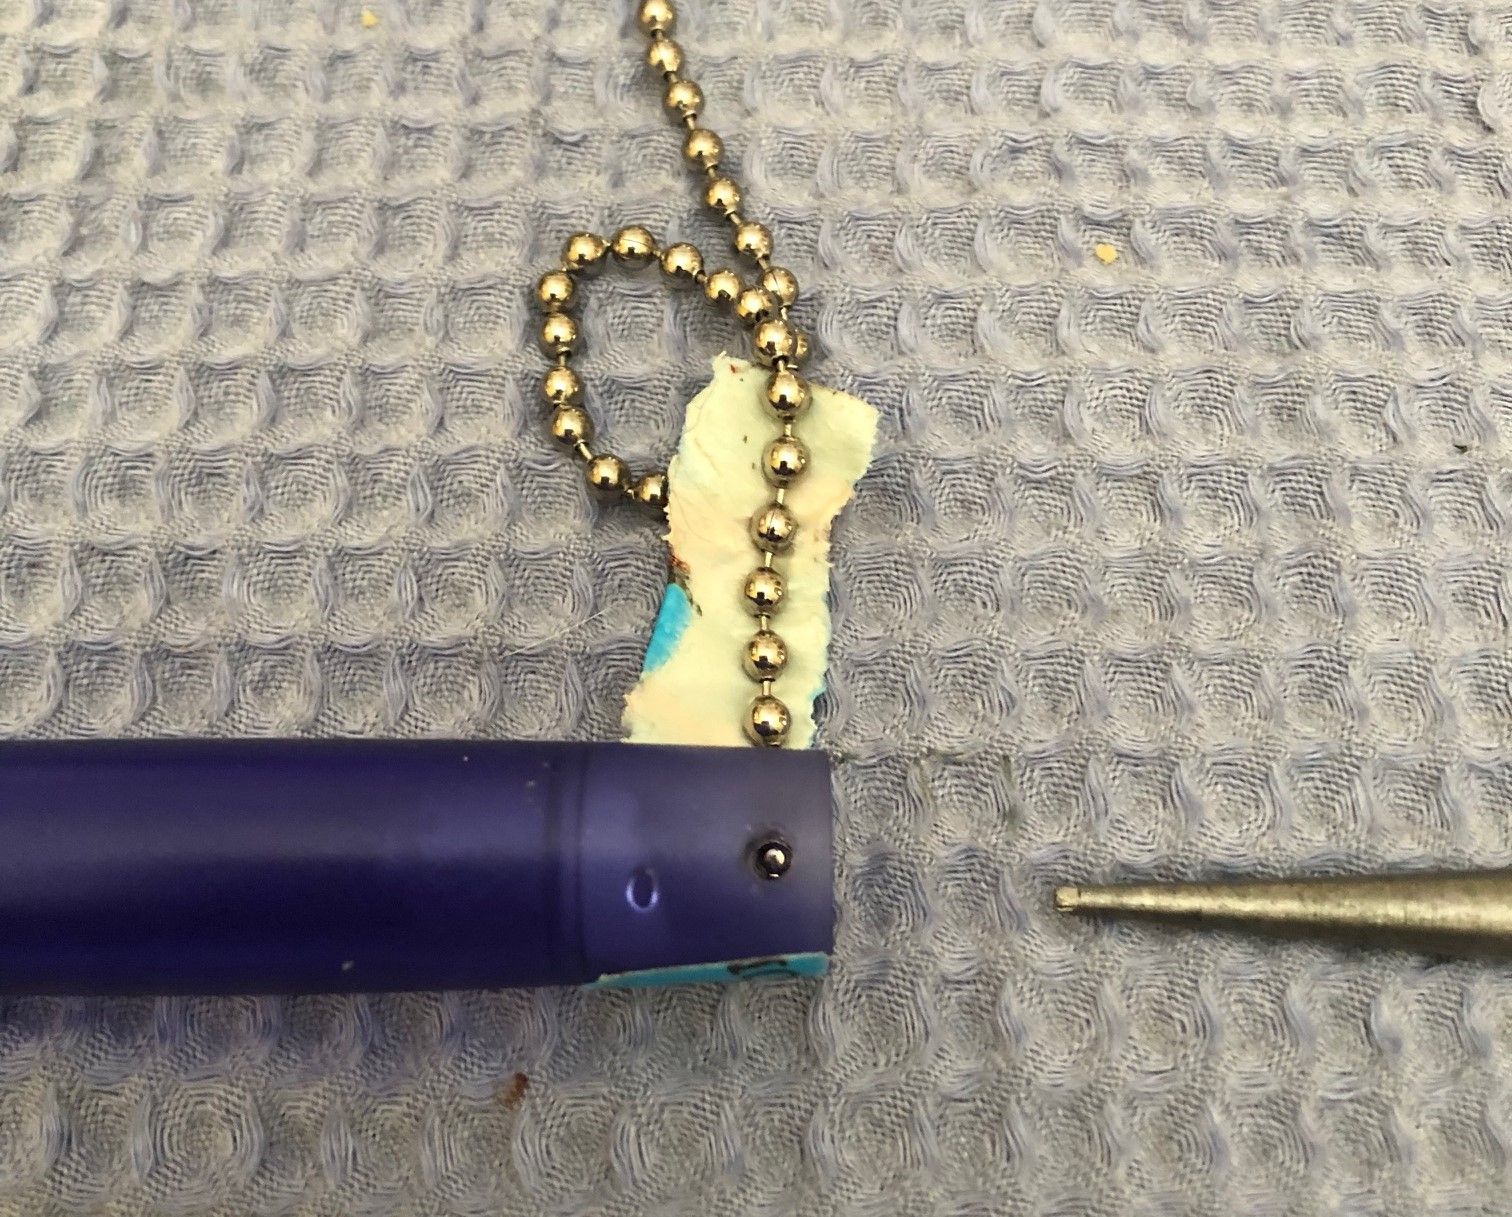
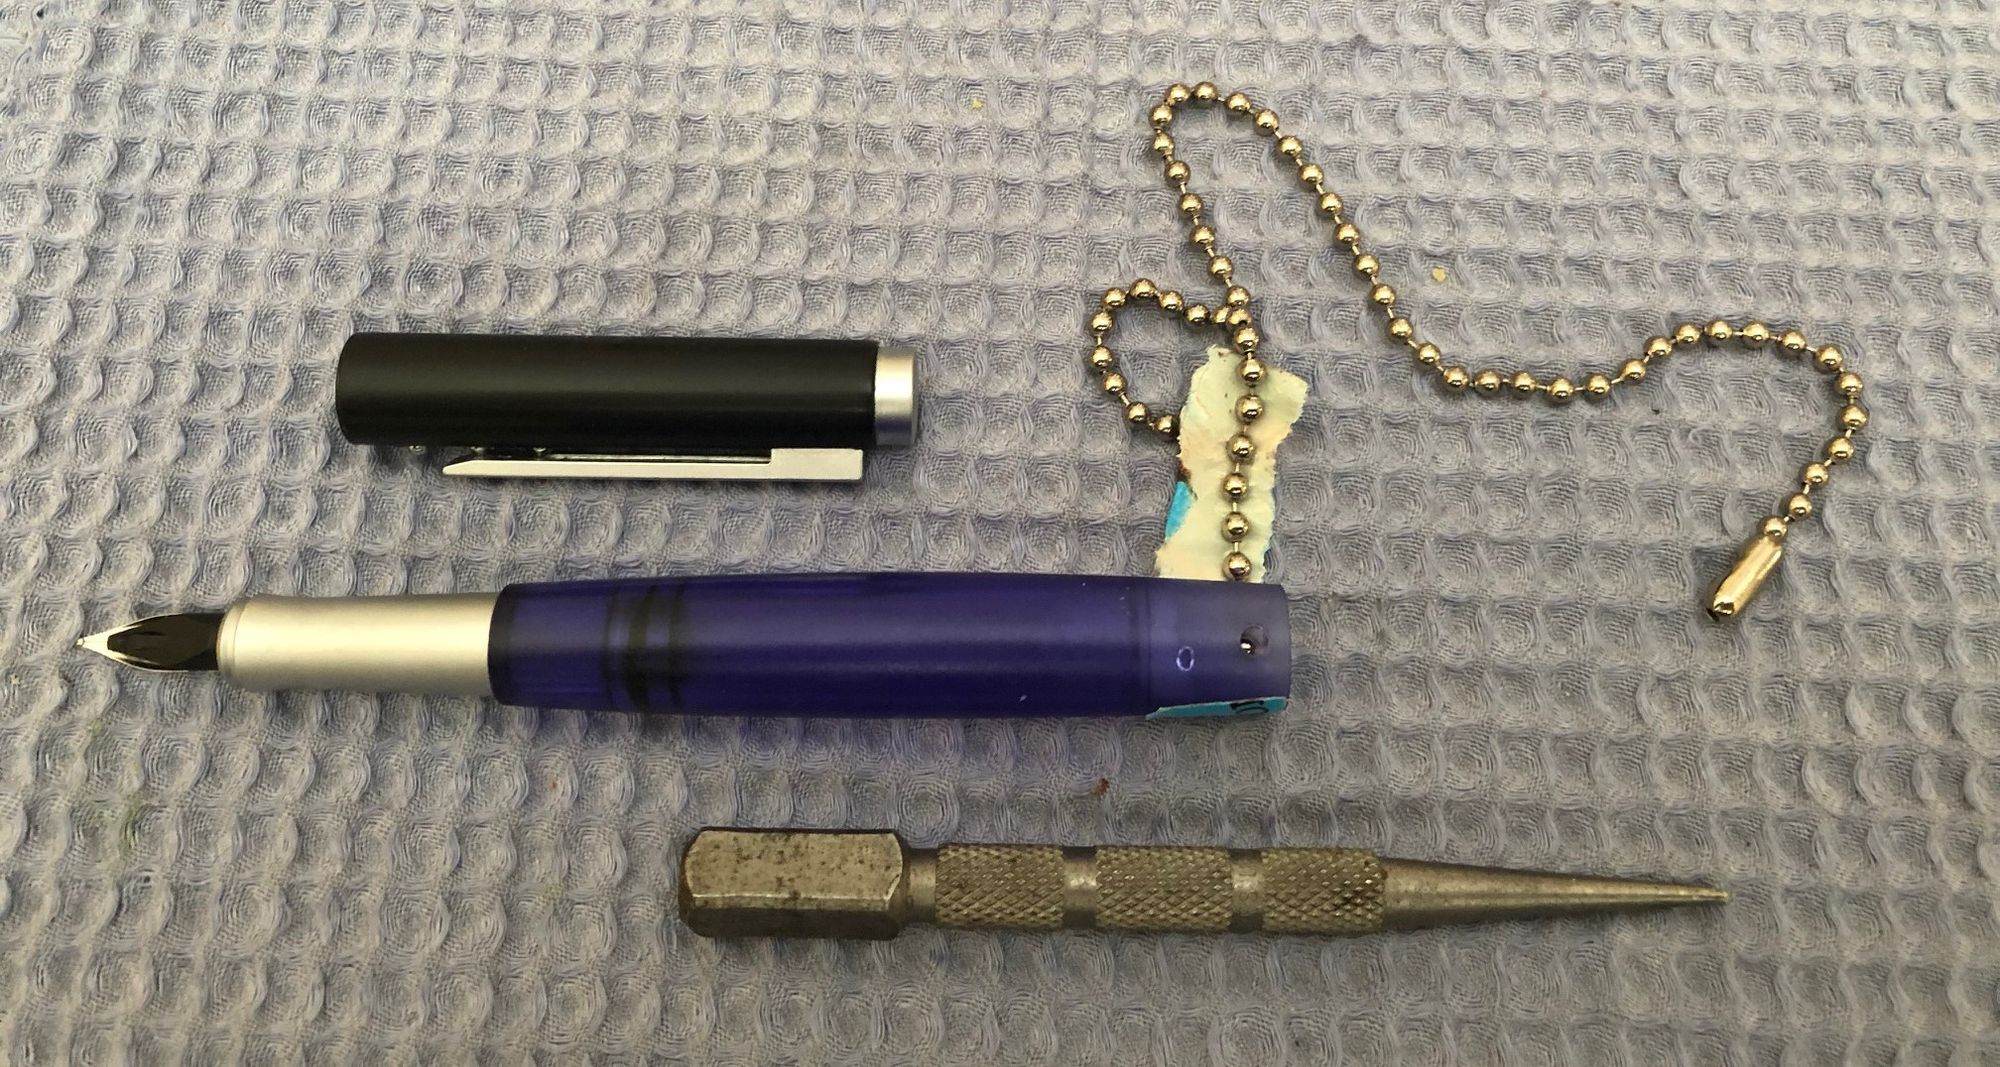
4. Reset the plan: What else do I have to fit in the dot without damaging it? A nail set!
5. Press the nail punch into the dot and pull the cap outward.
6. Adapt the plan: I need a free hand to pull out the cap. Options?
· Clamp in a vice - not a good idea as it could break the pen barrel.
· Press the punch against my stomach? Success!
7. Clean the mechanism and reassemble the pen.
Sidebar
I have two Level 5 pens, one inked and the other empty. As the article online cautioned, all the ink will come out when you remove the end cap. Allowing discretion to be the better part of valor, I decided to remove the end caps in the kitchen sink.
After proving my methodology, it was time for the pen with lots of lovely blue Pelikan ink. True to the article's warning, the ink came out in a hurry! As I pulled the end cap out, it separated from the mechanism, leaving it in the pen's barrel. The tiny o-ring gasket also stayed in the barrel. Time to adapt!
- I carefully retrieved the o-ring gasket using a dental pick and set it aside for safekeeping.
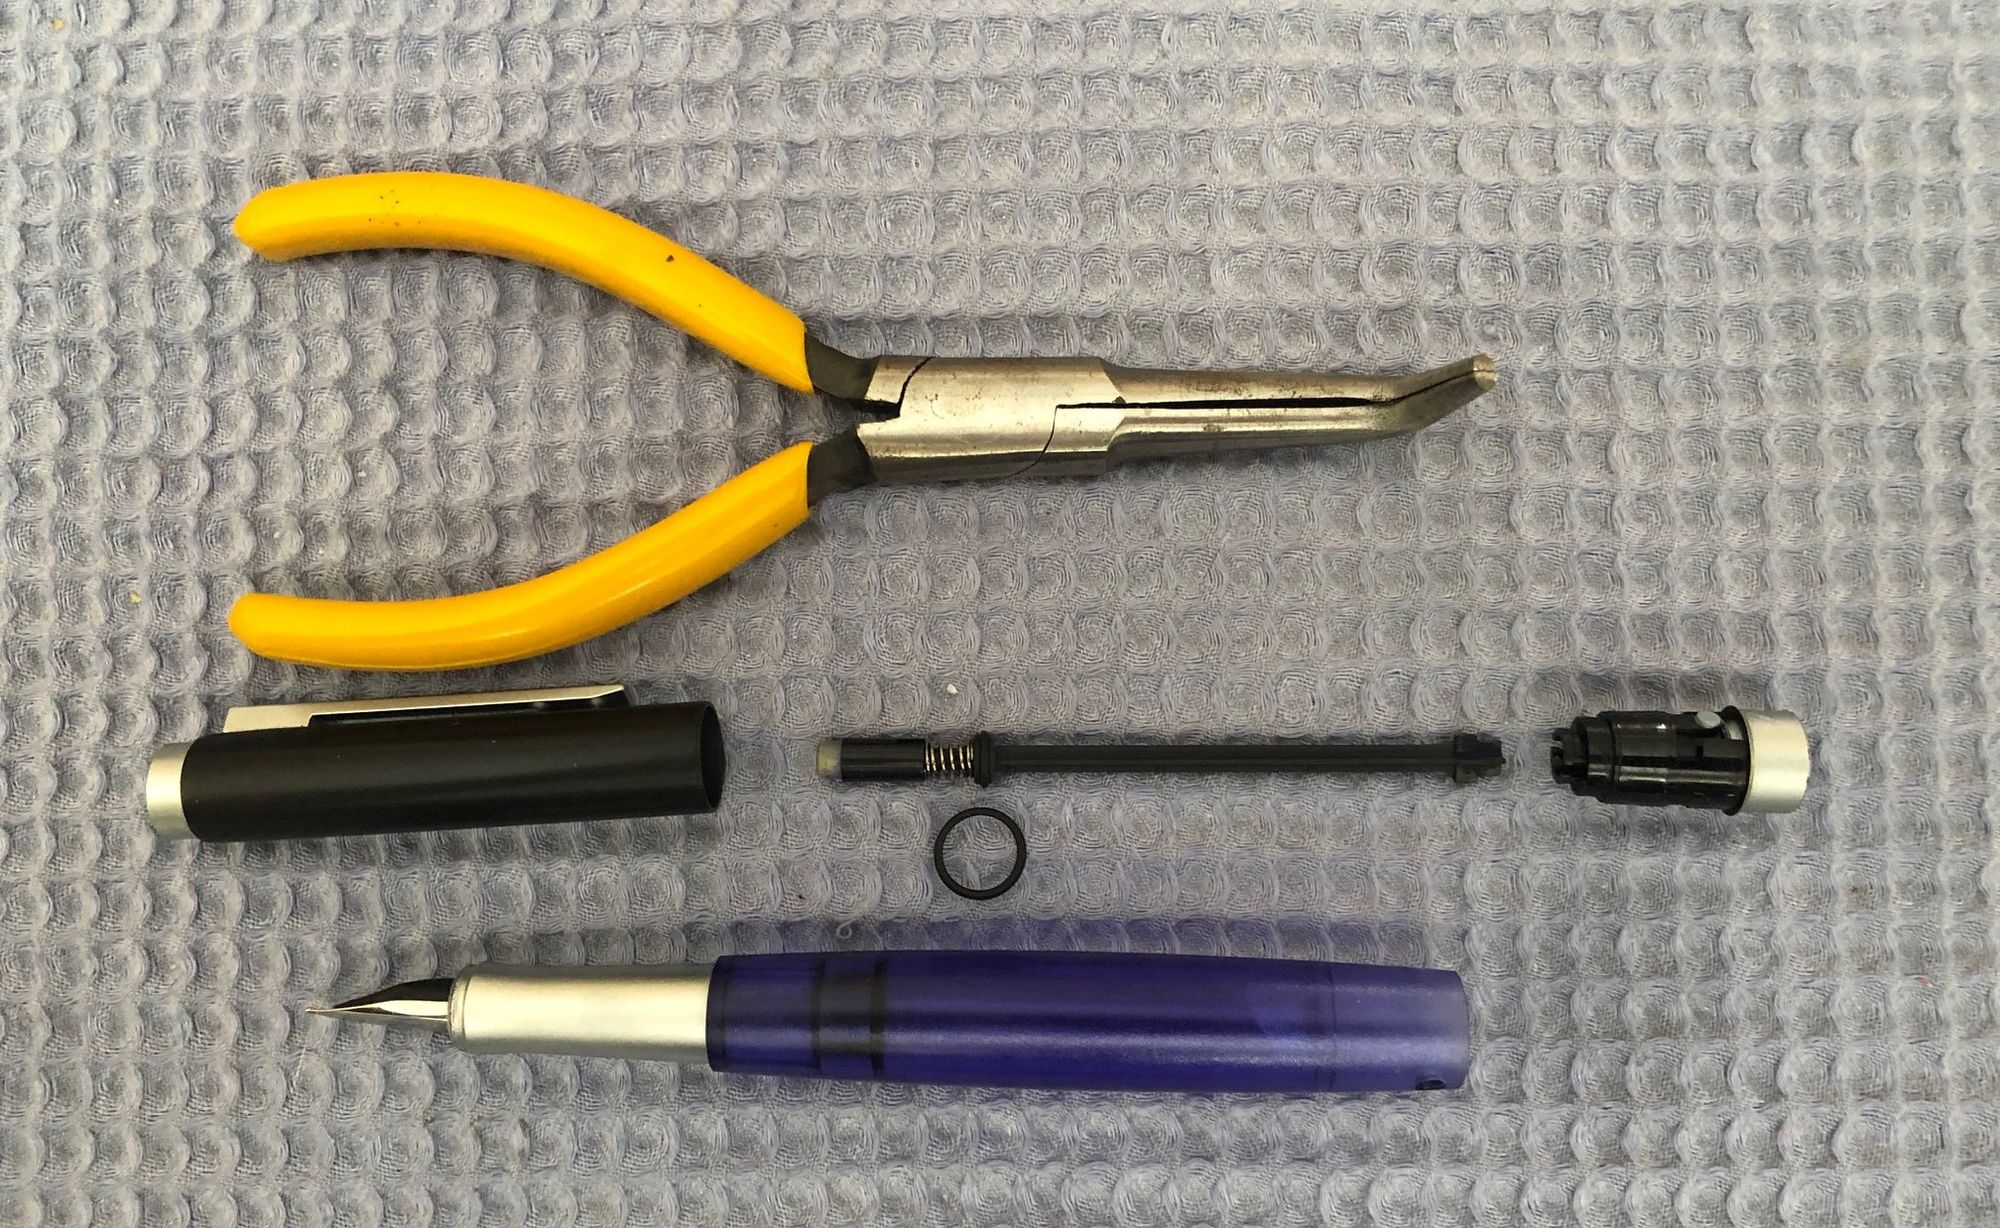
- As for the stuck mechanism, it was apparent a set of slender needle nose pliers was needed to carefully pull it free. My standard needle nose was too big. Fortunately, I had a pair for delicate work, and even better, the tips were bent at a 90o angle.
- After carefully inserting the pliers, I grabbed the end of the mechanism firmly but not hard enough to damage the plastic and pulled it free.

Did it work?
My disassembly procedure worked like a charm, so I was excited to see if the pens worked. Unfortunately, I cannot get either pen to take ink which means one of two things:
- Something other than the mechanism is clogged, or
- The valve on the ink bottle is clogged.
It appears I have another thought experiment to conduct. But I have the satisfaction of running through the disassembly thought experiment and seeing it work.
Was the entire process a waste of time?
Not in the least. Even if neither pen works again, I enjoyed the process of thinking through the process, which is valuable in itself. It also underscores the mindset needed to repair things yourself, an insatiable curiosity and satisfaction with the journey. I encourage you to find out for yourself.